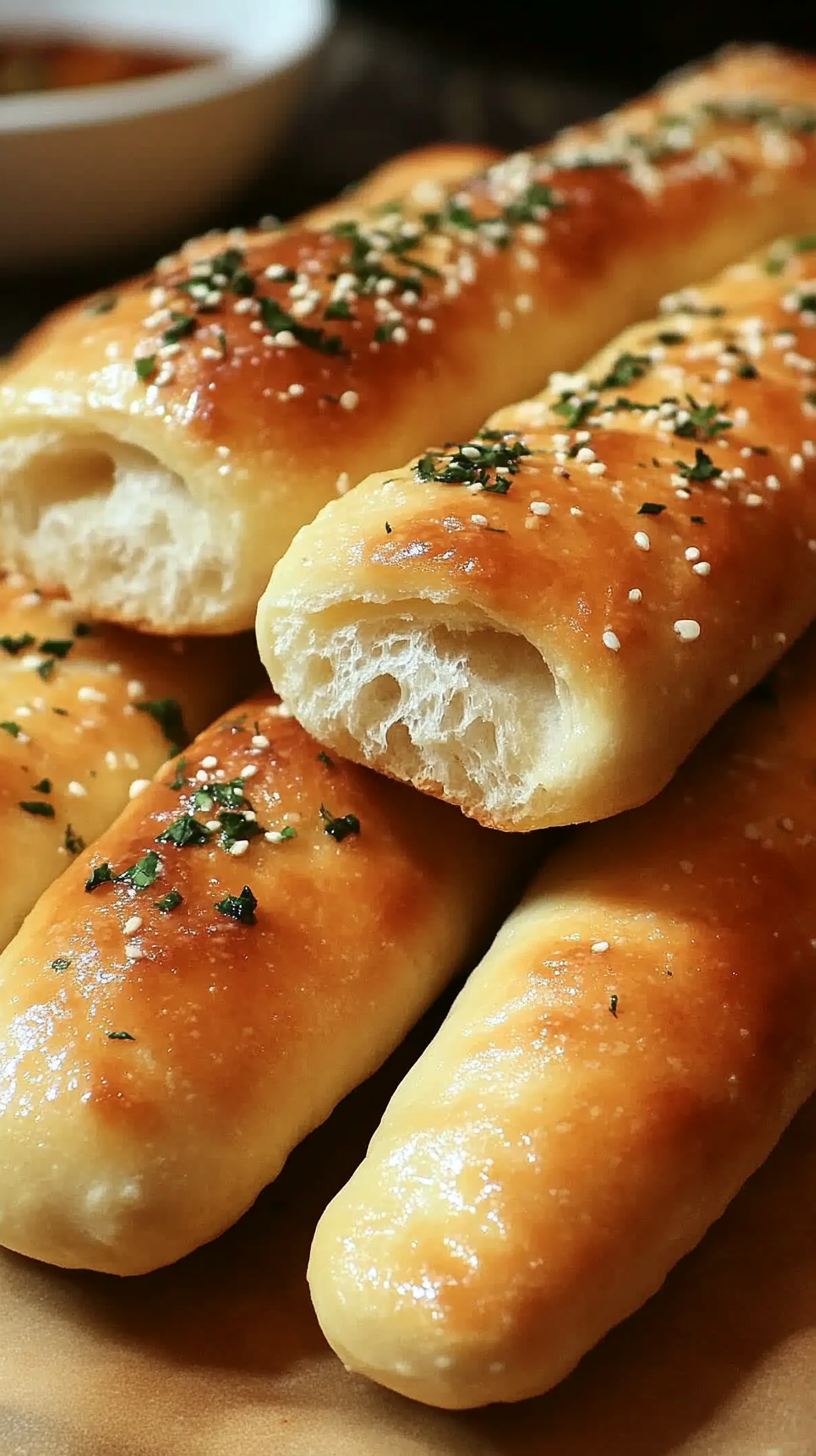
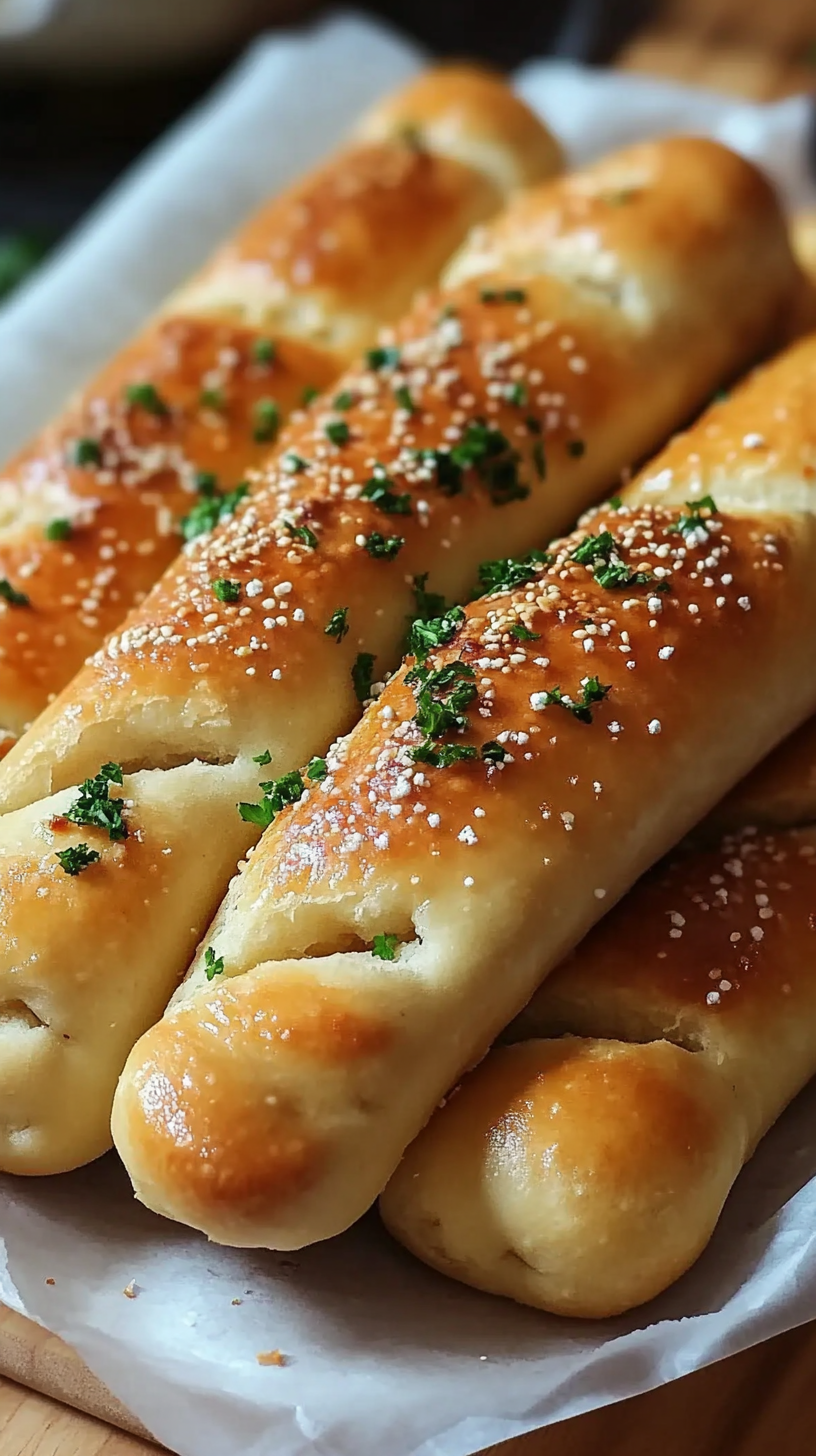
Olive Garden Breadsticks Recipe

There’s a certain magic that happens when you step into an Olive Garden Breadsticks and are welcomed by the warm, enticing aroma of freshly baked breadsticks. These golden delights, soft on the inside and perfectly brushed with garlic butter, have become a beloved staple for many.
But why limit the enjoyment to just dining out? Making your own version at home opens the door to endless variations! Consider adding herbs like rosemary or thyme for a fragrant twist, or experimenting with different seasonings to create your signature breadstick.
For those looking to elevate their breadstick game even further, we’ll share expert tips on achieving that perfect, restaurant-quality texture and flavor. Get ready to embark on a culinary adventure that will fill your kitchen with warmth and flavor, making every meal a little more special!
Ingredients:
Creating the beloved Olive Garden Breadsticks at home requires a carefully curated list of ingredients. Below is what you’ll need to serve 8-10 people:
Basic Ingredients:
- 4 cups all-purpose flour
- 1 packet (2 ¼ teaspoons) active dry yeast
- 1 ½ cups warm water (about 110°F or 45°C)
- ¼ cup granulated sugar
- 2 teaspoons salt
- ¼ cup unsalted butter, melted
- 1 tablespoon olive oil
For the Topping:
- ¼ cup unsalted butter, melted (for brushing)
- 1 teaspoon garlic salt
- 1 teaspoon dried parsley flakes (optional, for garnish)
Variations and Alternative Ingredients:
While the above ingredients create a classic version, feel free to experiment with the following suggestions for flavor enhancements:
- Herb-Infused Breadsticks: Add 1 teaspoon of dried oregano or Italian seasoning to the dough for extra flavor.
- Cheesy Twist: Incorporate ½ cup of shredded parmesan or mozzarella cheese into the dough before kneading for a cheesy take on the classic.
- Garlic Butter Variant: For an intense garlic flavor, mix minced fresh garlic or garlic powder into the melted butter before brushing it on the breadsticks.
- Whole Wheat Option: Substitute up to half of the all-purpose flour with whole wheat flour for a healthier version.
Adjusting these ingredients or adding personal touches can give you a unique spin on your homemade breadsticks. With these components ready to go, you’re just a step away from enjoying these soft, buttery, and delicious breadsticks right in the comfort of your home!
How to prepare:
Making Olive Garden Breadsticks at home is simple and rewarding. Follow these steps carefully to create delicious, soft, and buttery breadsticks.
Gather Your Ingredients
Start by collecting all the necessary ingredients. You will need all-purpose flour, yeast, sugar, salt, warm water, and butter. Having everything ready will streamline the process.
Activate the Yeast
In a small bowl, combine one packet of yeast with one tablespoon of sugar and half a cup of warm water. Stir the mixture gently and let it sit for about 5–10 minutes until it becomes frothy. This indicates that the yeast is active.
Mix Dry Ingredients
In a large mixing bowl, add three cups of flour and one teaspoon of salt. Whisk these ingredients together to combine them evenly.
Combine with Wet Ingredients
Once your yeast mixture is ready, pour it into the bowl with the dry ingredients. Add two tablespoons of melted butter. Mix everything together until a soft dough begins to form.
Knead the Dough
Transfer the dough onto a floured surface. Knead it for about 5–7 minutes until it becomes smooth and elastic. If the dough is sticky, sprinkle a bit of flour as needed.
Let It Rise
Place the dough in a lightly greased bowl. Cover it with a clean kitchen towel or plastic wrap. Allow it to rise in a warm spot for about one hour, or until it has doubled in size.
Shape the Breadsticks
After the dough has risen, punch it down gently to release the air. Turn it out onto a floured surface and divide the dough into 10–12 equal pieces. Roll each piece into a long strip, about 7 inches long. Place them on a greased baking sheet.
Second Rise
Cover the shaped breadsticks with a towel and let them rise again for about 30 minutes. This step helps to achieve a light and airy texture.
Bake the Breadsticks
Preheat your oven to 400°F (200°C). Once preheated, bake the breadsticks for 12–15 minutes, or until they are golden brown.
Add Toppings
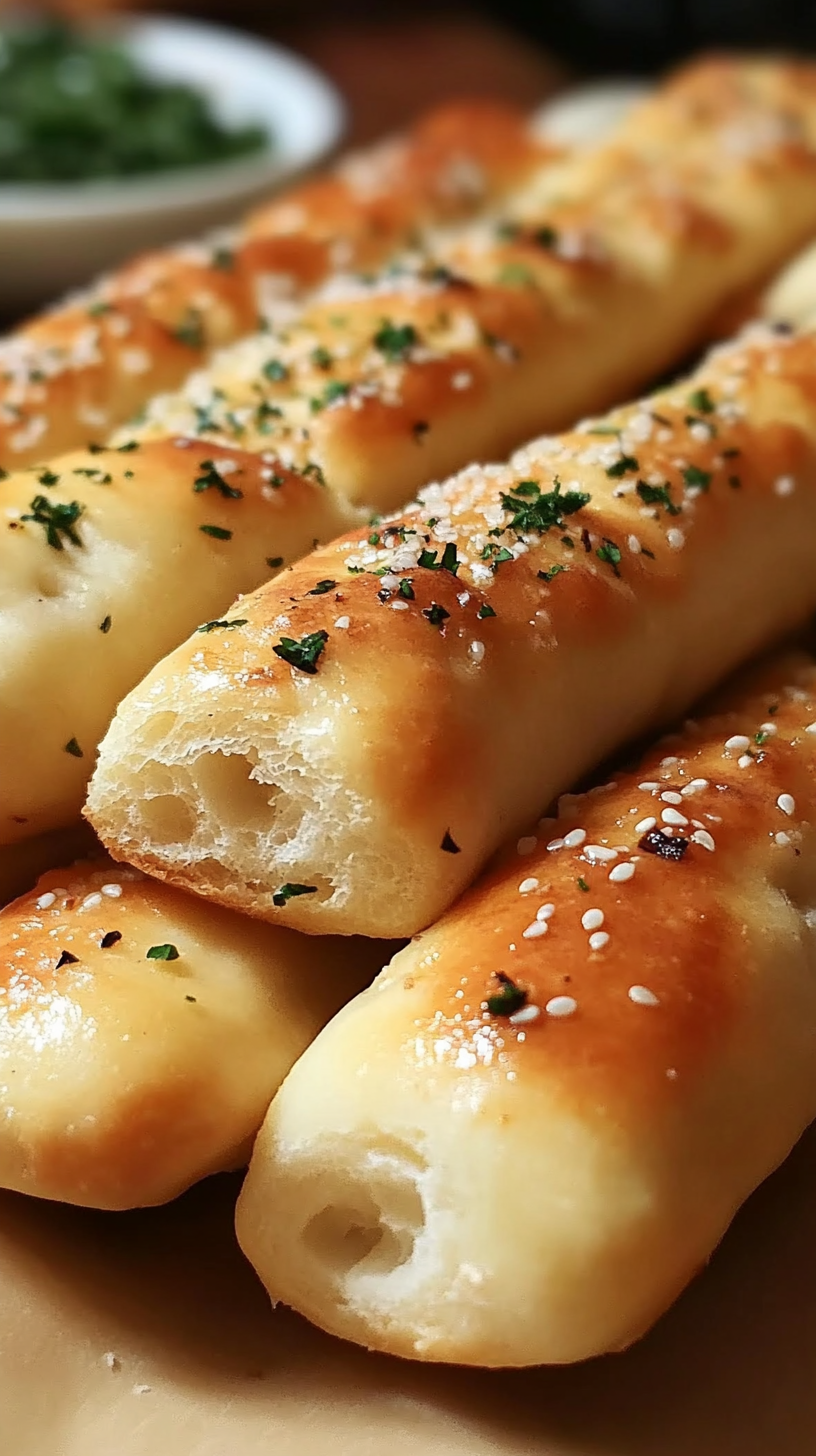
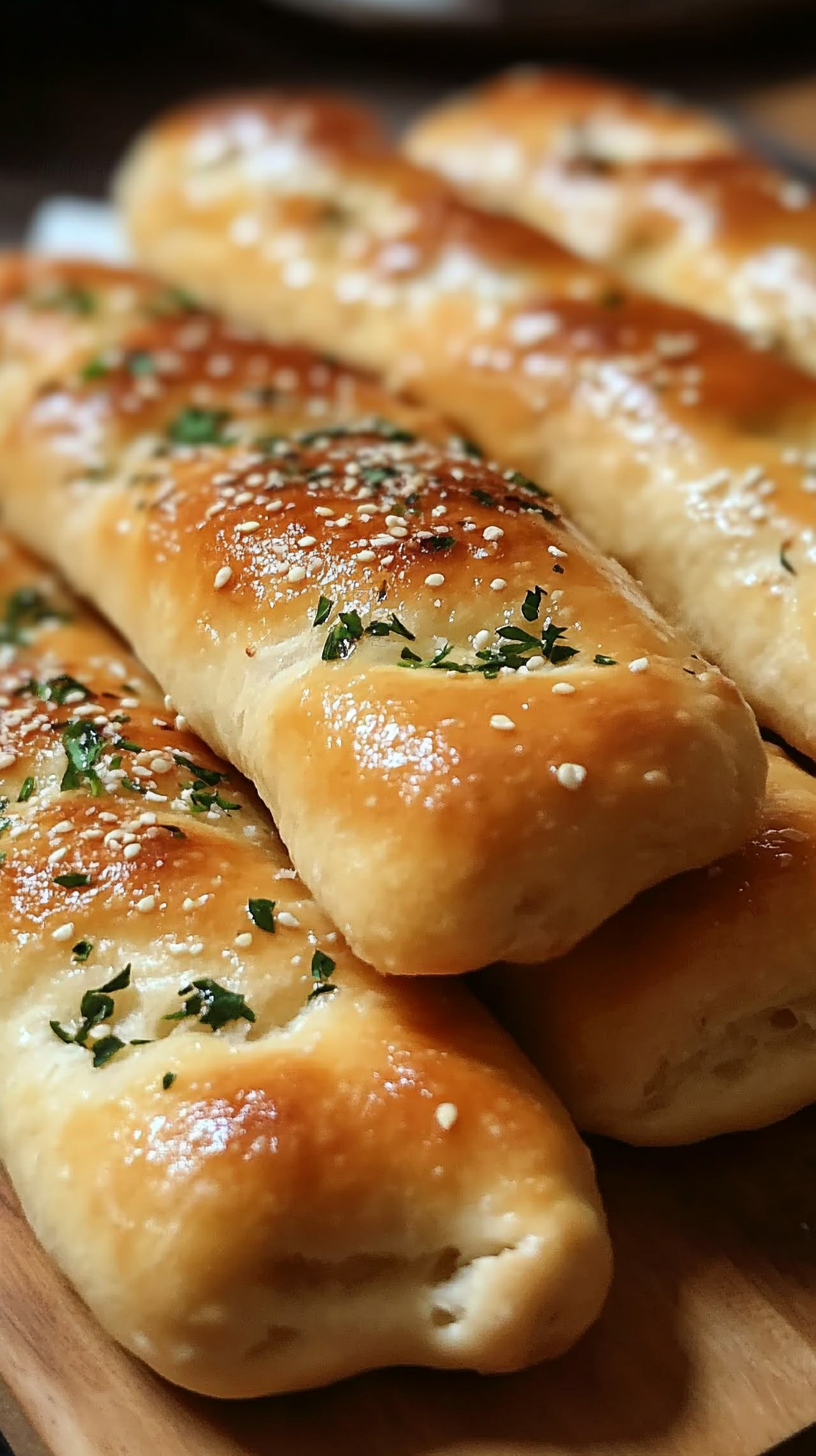
As soon as they come out of the oven, brush the breadsticks generously with melted butter, and sprinkle them with garlic powder and salt for extra flavor.
Serve warm and enjoy your homemade breadsticks, perfect for any meal or as a delightful snack!
Tips for the Perfect Olive Garden Breadsticks
Making breadsticks require attention to detail. Follow these tips to achieve the best results.
Maintain the Right Temperature
The dough needs warmth for proper rising. Keep your kitchen temperature between 75°F and 80°F. If it’s cooler, place the bowl in a warm spot, like near a preheating oven. Avoid direct heat, as too much warmth can kill the yeast. Use a thermometer for accuracy.
Choose Quality Ingredients
Using high-quality ingredients ensures the best flavor. Opt for all-purpose flour that has enough protein to create a chewy texture. Fresh yeast is key; it activates faster than older yeast. If using dry yeast, make sure it’s fresh as well. Don’t forget about salt; it not only enhances flavor but also strengthens the dough.
Variations for Dietary Restrictions
If you’re accommodating dietary needs, simple substitutions work well. For gluten-free breadsticks, use a gluten-free flour blend. Ensure the blend contains xanthan gum, which helps with texture. For a lower-carb version, consider using almond flour mixed with a binding agent like eggs. To make them vegan, substitute the butter with vegetable oil or a plant-based butter alternative.
Keep an Eye on the Dough
During the rising process, always keep an eye on the dough. It should double in size. Typically, this takes about 1-2 hours. If it hasn’t risen enough, let it sit longer. Once you shape the breadsticks, a second rise is essential for fluffy results. Allow them to rest while your oven preheats.
Brush for Flavor
Don’t skip the finishing touch of butter. Melted butter brushed on top not only adds flavor but also contributes to a beautiful golden crust. For extra flavor, mix in garlic powder or herbs. This way, your breadsticks stand out with added aroma and taste.
Perfecting the Baking Process
Lastly, bake at the right temperature. Set your oven to 400°F for optimal results. Check the breadsticks a few minutes before the timer goes off. Look for a light golden color; this signals they are ready. Allow them to cool slightly before serving to enhance the texture.
With these helpful tips, you’ll create amazing breadsticks that will impress everyone at your table.
Storage Tips:
When you have leftover Olive Garden breadsticks, proper storage can help maintain their freshness. Follow these tips to keep them tasting great for as long as possible.
Cooling the Breadsticks
First, allow your breadsticks to cool down to room temperature. Placing warm breadsticks in a storage container can create moisture, leading to sogginess. To avoid this, let them sit out for about 30 minutes after baking.
Choosing the Right Container
Select an airtight container or a resealable plastic bag for storage. These materials prevent air from entering, which can make the breadsticks stale. If you use a plastic bag, squeeze out as much air as possible before sealing. Ensure the lid is secured tight on the container.
Optimal Storage Conditions
To maintain the best quality, store the breadsticks in a cool, dry place, away from direct sunlight. A pantry shelf often works well for short-term storage. Avoid the refrigerator, as it can introduce moisture and change the texture.
Freezing for Long-term Storage
If you want to store the breadsticks for an extended period, consider freezing them. Wrap each stick in plastic wrap or aluminum foil and place them in an airtight freezer bag. Doing this will help preserve their texture and flavor for up to 3 months. When you’re ready to eat, simply thaw them at room temperature, then warm them in the oven for a few minutes to freshen them up.
Reheating Tips
For the best taste, reheat breadsticks in an oven instead of a microwave. Preheat your oven to 350°F (175°C) and place the breadsticks on a baking sheet. Heat them for about 5–10 minutes, or until they become warm and slightly crispy. This method helps restore their original consistency.
Checking Freshness and Shelf Life
Keep an eye on how long you store the breadsticks. When stored at room temperature, they last 1-2 days. In the fridge, they will be good for about 3-5 days. If you freeze them, use within 3 months for the best quality. Always check for signs of mold or off smells before consuming, as these indicate spoilage.
By following these storage tips, you can enjoy the deliciousness of Olive Garden breadsticks well after your last visit. Implement these practices to maximize freshness and flavor.
Related Recipes You’ll Love:
If you love the deliciousness of Olive Garden Breadsticks, you might also enjoy these recipes that complement their taste and texture. Each option offers a unique twist, while still highlighting the flavors you know and love.
Garlic Parmesan Knots
These knots provide a similar soft and buttery experience. Made from pizza dough, you can easily shape them into knots and bake until golden brown. Topping them with garlic butter and Parmesan creates a flavor that pairs beautifully with any pasta dish, much like how breadsticks do.
Garlic Swirl Rolls Recipe : are the perfect fusion of soft, pillowy bread and the irresistible allure of aromatic garlic. Imagine pulling apart a warm roll, the steam escaping as you reveal a golden, buttery interior infused with savory goodness. These irresistible rolls elevate any meal, making them a delightful side dish or a standalone snack for garlic lovers.
Homemade Focaccia Bread
Focaccia is a versatile Italian bread that’s perfect for dipping into sauces. Its crispy exterior and fluffy interior mimic the texture of the beloved breadsticks. You can infuse focaccia with various toppings, from rosemary to sun-dried tomatoes, making it an exciting alternative.
Herb-Infused Soft Dinner Rolls
These rolls are soft and pillowy, similar in texture to what you enjoy in Olive Garden’s offerings. Adding herbs like oregano and basil can enhance the flavor, making them an excellent side for Italian meals. Pair these rolls with marinara or Alfredo sauce for a delightful experience.
Cheesy Garlic Bread
If you love the combo of garlic and cheese, cheesy garlic bread is a great choice. Use a fresh baguette or Italian bread, slather it with garlic butter, and add shredded cheese before baking. This dish serves as a fantastic accompaniment to any meal, bringing that same comforting vibe as the classic breadsticks.
Incorporating any of these recipes into your meal planning can give you a taste of Italy while satisfying your cravings for soft, flavorful bread options.
Frequently Asked Questions:
What are Olive Garden Breadsticks made of?
The famous breadsticks served at Olive Garden are crafted using simple ingredients such as flour, yeast, sugar, salt, and water. This combination creates a light, fluffy texture that contrasts beautifully with the buttery garlic topping that enhances their flavor.
How can I make breadsticks similar to Olive Garden’s at home?
To recreate breadsticks reminiscent of those served at Olive Garden, start by preparing a basic pizza dough or bread dough. After the dough has risen, divide it into portions, roll them into sticks, and bake until golden brown. Adding a melted butter and garlic mixture on top right after baking will elevate the flavor to closely match the iconic breadsticks.
Are Olive Garden Breadsticks vegan?
The original recipe for the beloved breadsticks includes dairy in the form of butter. However, variations can be made to create a vegan version by substituting the butter with plant-based margarine or olive oil. This accommodates those following a vegan diet while maintaining a similar taste and texture.
Can you freeze Olive Garden-style breadsticks?
Yes, you can freeze breadsticks similar to those found at Olive Garden. After baking and cooling them completely, wrap them tightly in plastic wrap and place them in a freezer-safe bag. When you’re ready to enjoy them, simply thaw and reheat in an oven to restore their original freshness.
What is the best way to reheat leftover breadsticks?
To reheat leftover breadsticks, preheat your oven to 350°F (175°C). Wrap the breadsticks in aluminum foil to retain moisture and place them in the oven for about 10-15 minutes. This method helps revitalize their texture while keeping them soft and warm.
Where can I find the nutrition information for the breadsticks?
The nutritional information for the breadsticks served at Olive Garden can typically be found on their official website or by inquiring with their staff at any location. This will provide details about calories, fat, sodium, and other important dietary metrics for those monitoring their intake.
Conclusion:
Homemade breadsticks inspired by the cherished Olive Garden Breadsticks bring the perfect blend of simplicity, flexibility, and customization to your kitchen. With just a few staple ingredients, you can whip up this delightful bread that pairs beautifully with any Italian meal or stands alone as a delicious snack.
The dough is easily adjustable, allowing you to experiment with various herbs and cheeses to suit your taste preferences. Consider adding garlic powder or Parmesan for an extra kick, or even incorporating your favorite toppings for a unique twist. Best of all, these sticks can be made in large batches and frozen for later enjoyment, ensuring that fresh, warm bread is always within reach.
Embrace your inner chef and create your version of this beloved classic, transforming any meal into a memorable experience.
Print
Olive Garden Breadsticks Recipe
- Total Time: 2hours 35minutes
Description
There’s a certain magic that happens when you step into an Olive Garden Breadsticks and are welcomed by the warm, enticing aroma of freshly baked breadsticks. These golden delights, soft on the inside and perfectly brushed with garlic butter, have become a beloved staple for many.
Ingredients
Basic Ingredients:
- 4 cups all-purpose flour
- 1 packet (2 ¼ teaspoons) active dry yeast
- 1 ½ cups warm water (about 110°F or 45°C)
- ¼ cup granulated sugar
- 2 teaspoons salt
- ¼ cup unsalted butter, melted
- 1 tablespoon olive oil
For the Topping:
- ¼ cup unsalted butter, melted (for brushing)
- 1 teaspoon garlic salt
- 1 teaspoon dried parsley flakes (optional, for garnish)
Variations and Alternative Ingredients:
While the above ingredients create a classic version, feel free to experiment with the following suggestions for flavor enhancements:
- Herb-Infused Breadsticks: Add 1 teaspoon of dried oregano or Italian seasoning to the dough for extra flavor.
- Cheesy Twist: Incorporate ½ cup of shredded parmesan or mozzarella cheese into the dough before kneading for a cheesy take on the classic.
- Garlic Butter Variant: For an intense garlic flavor, mix minced fresh garlic or garlic powder into the melted butter before brushing it on the breadsticks.
- Whole Wheat Option: Substitute up to half of the all-purpose flour with whole wheat flour for a healthier version.
Instructions
Gather Your Ingredients
Start by collecting all the necessary ingredients. You will need all-purpose flour, yeast, sugar, salt, warm water, and butter. Having everything ready will streamline the process.
Activate the Yeast
In a small bowl, combine one packet of yeast with one tablespoon of sugar and half a cup of warm water. Stir the mixture gently and let it sit for about 5–10 minutes until it becomes frothy. This indicates that the yeast is active.
Mix Dry Ingredients
In a large mixing bowl, add three cups of flour and one teaspoon of salt. Whisk these ingredients together to combine them evenly.
Combine with Wet Ingredients
Once your yeast mixture is ready, pour it into the bowl with the dry ingredients. Add two tablespoons of melted butter. Mix everything together until a soft dough begins to form.
Knead the Dough
Transfer the dough onto a floured surface. Knead it for about 5–7 minutes until it becomes smooth and elastic. If the dough is sticky, sprinkle a bit of flour as needed.
Let It Rise
Place the dough in a lightly greased bowl. Cover it with a clean kitchen towel or plastic wrap. Allow it to rise in a warm spot for about one hour, or until it has doubled in size.
Shape the Breadsticks
After the dough has risen, punch it down gently to release the air. Turn it out onto a floured surface and divide the dough into 10–12 equal pieces. Roll each piece into a long strip, about 7 inches long. Place them on a greased baking sheet.
Second Rise
Cover the shaped breadsticks with a towel and let them rise again for about 30 minutes. This step helps to achieve a light and airy texture.
Bake the Breadsticks
Preheat your oven to 400°F (200°C). Once preheated, bake the breadsticks for 12–15 minutes, or until they are golden brown.
Add Toppings
As soon as they come out of the oven, brush the breadsticks generously with melted butter, and sprinkle them with garlic powder and salt for extra flavor.
Notes
Maintain the Right Temperature
The dough needs warmth for proper rising. Keep your kitchen temperature between 75°F and 80°F. If it’s cooler, place the bowl in a warm spot, like near a preheating oven. Avoid direct heat, as too much warmth can kill the yeast. Use a thermometer for accuracy.
- Prep Time: 20 minutes
- Cook Time: 15 minutes (+2 hrs resting time)
- Category: Side Dishes
Nutrition
- Serving Size: 12 breadsticks
- Calories: 225 Calories
- Fat: 9g
- Carbohydrates: 31g
- Protein: 4g
Keywords: Side Dishes; Thanksgiving, Side Dishes, Yeast Breads Rolls and Buns; Christmas Side Dishes