Garlic Swirl Rolls Recipe
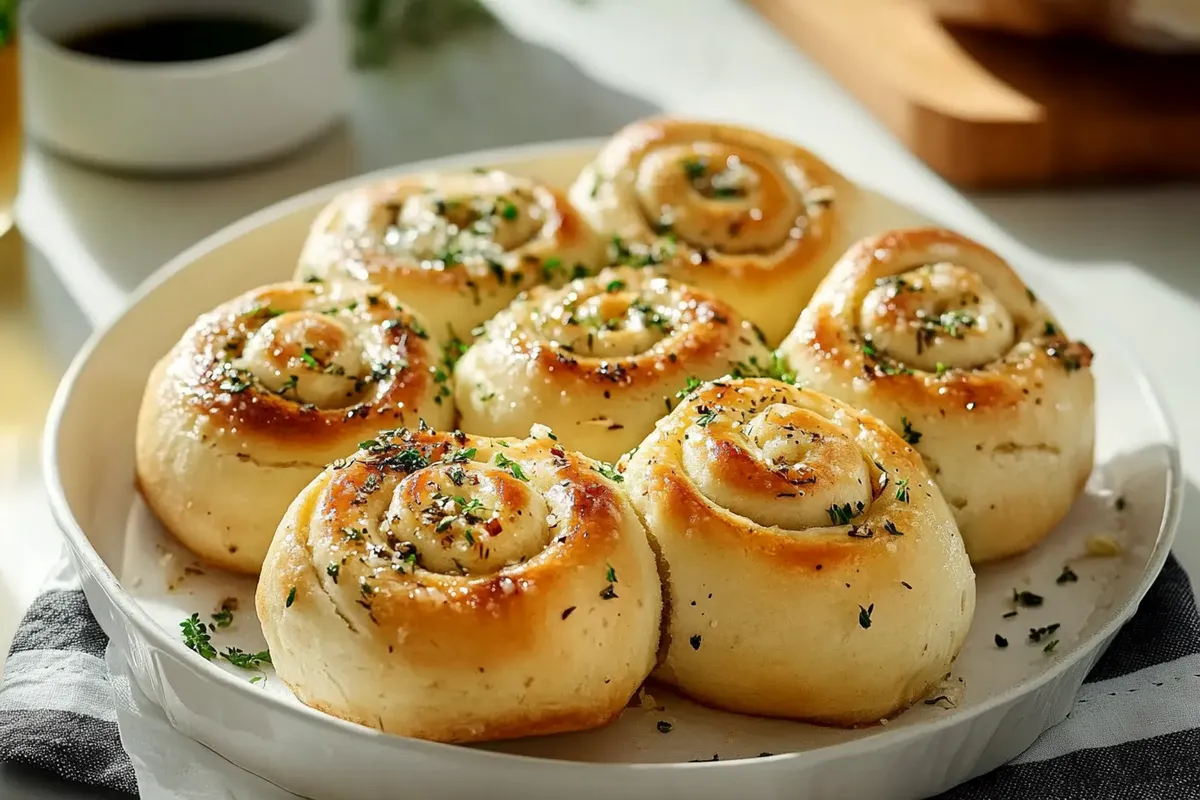
Garlic Swirl Rolls are the perfect fusion of soft, pillowy bread and the irresistible allure of aromatic garlic. Imagine pulling apart a warm roll, the steam escaping as you reveal a golden, buttery interior infuseGarlic Swirl Rolls Recipe
d with savory goodness. These irresistible rolls elevate any meal, making them a delightful side dish or a standalone snack for garlic lovers.
What’s even better? The recipe is incredibly versatile! You can experiment by adding herbs like fresh rosemary or parsley, or even incorporate cheeses for a decadent twist. For those looking to add a touch of sweetness, a hint of roasted garlic and honey pairs beautifully, creating a rich flavor profile that pleases the palate.
Ingredients:
To create delicious and aromatic Garlic Swirl Rolls that will impress your family and friends, gather the following ingredients. This recipe yields about 8 to 10 rolls, perfect for sharing.
For the Dough:
- 4 cups all-purpose flour, sifted
- 2 ¼ teaspoons active dry yeast (1 packet)
- 1 ½ cups warm milk (about 110°F or 43°C)
- ½ cup granulated sugar
- ½ cup unsalted butter, melted
- 2 large eggs
- 1 teaspoon salt
For the Garlic Filling:
- ⅓ cup unsalted butter, softened
- 4–6 cloves of garlic, minced (adjust based on your garlic preference)
- 2 tablespoons fresh parsley, finely chopped (or 1 tablespoon dried)
- 1 teaspoon Italian seasoning (optional for enhanced flavor)
- ½ teaspoon chili flakes (optional for a kick)
For the Topping:
- ¼ cup grated Parmesan cheese (or your favorite cheese)
- 2 tablespoons fresh parsley, finely chopped (for garnish)
- 1 tablespoon olive oil (to brush on top before baking)
Variations and Alternatives:
If you’d like to experiment with different flavors in your Garlic Swirl Rolls, consider these alternatives:
- Add a tablespoon of sun-dried tomatoes for a Mediterranean twist.
- Incorporate cooked, crumbled bacon or diced ham for a savory filling.
- Use herb-infused olive oil in place of regular olive oil to deepen the flavor.
- Replace parsley with fresh basil or cilantro for a unique herbal note.
These substitutions or additions can elevate the flavor profile of your rolls, making them customizable to your taste preferences. Get ready to enjoy a delightful dish that will take center stage at any gathering!
How to prepare:
To create delightful garlic swirl rolls, begin by gathering your ingredients. Ensure you have everything ready for a smooth cooking process.
Step 1: Prepare the Dough
In a mixing bowl, combine 4 cups of all-purpose flour, 1 packet (2 ¼ teaspoons) of instant yeast, and ½ teaspoon of salt. Whisk these dry ingredients together until well mixed.
Step 2: Activate the Yeast
In a separate bowl, heat 1 ½ cups of milk until warm, but not boiling. Add 3 tablespoons of sugar and stir until dissolved. Pour the milk mixture into the dry ingredients.
Step 3: Mix the Ingredients
Use a wooden spoon to stir the dough until it starts to form a ball. It’s okay if it’s slightly sticky; add a little more flour if necessary.
Step 4: Knead the Dough
Turn the dough onto a floured surface and knead it for about 5-7 minutes. Look for a smooth texture and elasticity in the dough.
Step 5: First Rise
Place the kneaded dough into a greased bowl. Cover it with a damp cloth and let it rise in a warm spot for 1-2 hours or until it has doubled in size.
Step 6: Prepare the Garlic Filling
While the dough is rising, make the garlic filling. In a small bowl, mix ½ cup of softened butter, 4 cloves of minced garlic, 2 tablespoons of chopped parsley, and a pinch of salt.
Step 7: Roll Out the Dough
Once the dough has risen, punch it down and roll it out onto a floured surface. Aim for a rectangle about 12×18 inches.
Step 8: Spread the Filling
Evenly spread the garlic mixture over the rolled dough, leaving about ½ inch of space at the edges.
Step 9: Roll the Dough
Begin at one end and tightly roll the dough into a log shape. Make sure it is compact to ensure even slices.
Step 10: Cut and Second Rise
Slice the rolled dough into 12 equal pieces. Place them in a greased baking dish. Cover and let them rise for another 30 minutes.
Step 11: Bake the Rolls
Preheat your oven to 375°F (190°C). Once heated, bake the rolls for 20-25 minutes, or until golden brown on top.
Step 12: Cool and Serve
Allow the rolls to cool slightly before serving. Enjoy the delicious aroma and flavor of your homemade garlic swirl rolls!
Tips for the Perfect Garlic Swirl Rolls
Dietary Substitutions
If you have dietary restrictions, you can still enjoy delicious rolls. For a gluten-free version, replace all-purpose flour with a gluten-free blend that contains xanthan gum. This provides the necessary structure. If you are dairy-free, substitute the butter with coconut oil or a vegan butter alternative, making sure it’s softened. For a lower-carb option, consider using almond flour. Adjust the liquid to maintain the right consistency, as almond flour absorbs moisture differently.
Experiment with Flavor Variations
While garlic is the star of the show, feel free to add fresh herbs for a flavor twist. Chopped parsley, rosemary, or thyme can enhance the aroma and taste of your rolls. You could also include a sprinkle of cheese in the filling, such as Parmesan or mozzarella, for a cheesy, savory delight. For extra kick, mix in crushed red pepper flakes or sautéed spinach for added texture and nutrition.
By following these practical tips, you can create Garlic Swirl Rolls that impress your family and friends. Happy baking!
Storage Tips:
To keep your garlic swirl rolls fresh and delicious, follow these practical storage tips. Maintaining optimal storage conditions ensures that these tasty treats retain their flavor and texture. Here’s what you need to know:
Refrigeration for Longer Freshness
If you need to keep garlic swirl rolls for more than two days, refrigeration is your best option. Cool the rolls completely before placing them in the refrigerator. Use an airtight container or a resealable plastic bag to keep them fresh. The rolls will typically last for about a week in the fridge. Make sure the container is sealed tight to prevent moisture build-up, which could affect their texture.
Freezing for Extended Storage
For longer storage, freezing is an excellent choice. Wrap each garlic swirl roll individually in plastic wrap, then place them in a freezer bag. Remove as much air as possible before sealing to minimize freezer burn. These rolls can last for up to three months in the freezer. When you’re ready to enjoy them, simply thaw the rolls in the refrigerator overnight or let them sit at room temperature for a couple of hours. You can also reheat them in the oven for a few minutes to restore their original texture.
Reheating Tips
When reheating garlic swirl rolls, preheat your oven to 350°F (175°C). Place the rolls on a baking sheet and cover them with aluminum foil. This method helps retain moisture while heating. Bake them for 10-15 minutes or until they are warmed through. You can also use a microwave, but the oven method usually yields better results in terms of texture.
Related Recipes to Enhance Your Baking Experience
If you love the delightful flavor and fluffy texture of garlic swirl rolls, you might enjoy these complementary recipes. Each one brings a similar essence to the table and can enhance your culinary skills while celebrating garlic and bread.
- Cheesy Herb Breadsticks: These breadsticks pair wonderfully with garlic swirl rolls. Their cheesy flavor and herb-infused dough create a perfect balance. Serve them with marinara sauce for dipping, making them a great appetizer or side dish that complements any meal.
- Garlic Parmesan Knots: If you crave more garlic goodness, these knots are a must-try. They combine the same rich garlic flavor with a twisty dough. You can use them to soak up pasta sauces or serve alongside a salad for a satisfying treat.
- Herbed Focaccia: This Italian flatbread offers a unique texture and rich flavor profile. The addition of garlic and fresh herbs makes it similar to the swirl rolls, but with a chewy finish. It’s perfect for sandwiches or as a base for a delicious bruschetta.
- Spinach and Cheese Stuffed Buns: If you’re looking for a heartier option, these stuffed buns provide a savory mix of flavors. While different in concept, the soft, fluffy texture of the buns makes them a comforting alternative to garlic swirl rolls. They work great as a filling snack or as part of a meal.
- Other Snacks You’ll Love:
Date Snickers: Deliciously Healthy Treats You’ll Love
Hawaiian Roll French Toast
These recipes not only highlight garlic as a central flavor but also enhance your baking repertoire. Enjoy trying them alongside your garlic swirl rolls and discover new favorites!
Frequently Asked Questions:
What are Garlic Swirl Rolls?
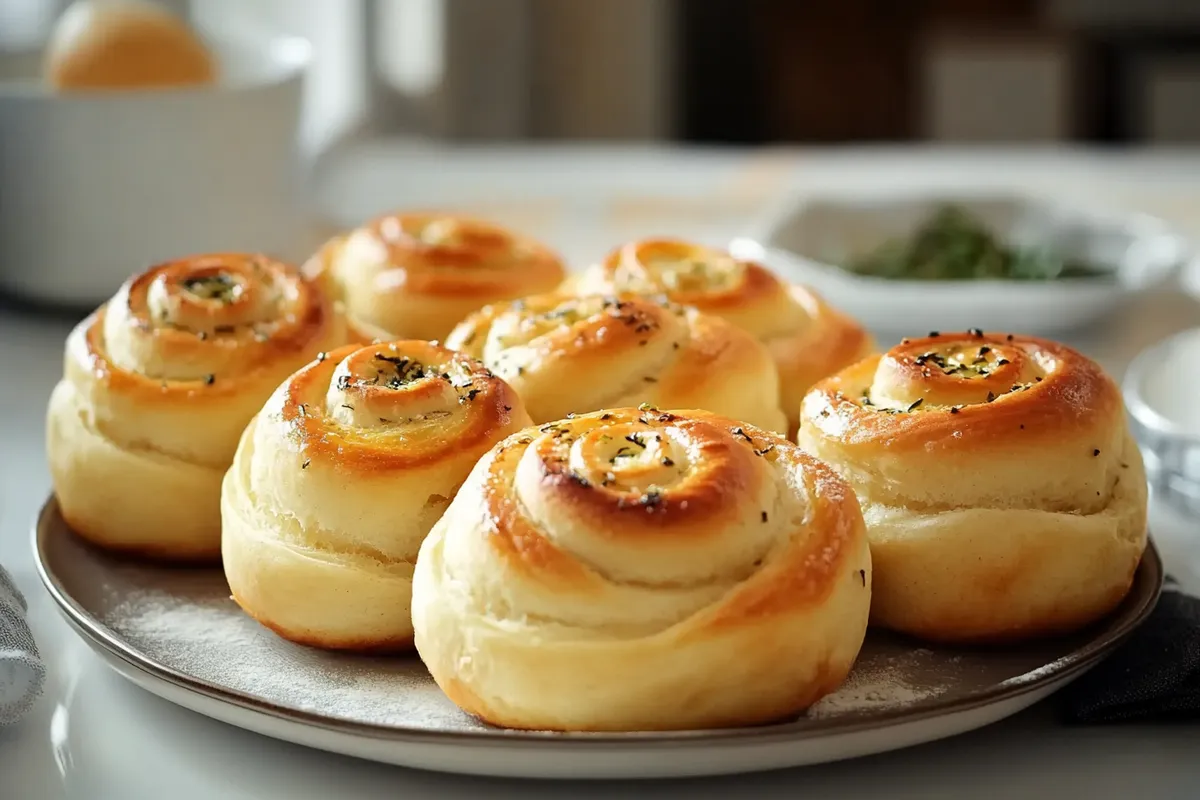
Garlic Swirl Rolls are delightful baked treats that combine the rich flavor of garlic with a soft, fluffy dough. They typically feature a spiral design filled with garlic butter and herbs, creating a perfect balance of taste and texture. These rolls are perfect as a side dish or a standalone snack, popular for gatherings and family meals alike.
How do I make Garlic Swirl Rolls from scratch?
Making these savory rolls at home starts with a basic yeast dough. You’ll mix flour, sugar, salt, yeast, milk, and butter to form a smooth batter. Once the dough has risen, roll it out, spread a generous layer of garlic butter, and sprinkle with herbs. Roll it into a log, slice it into rounds, and bake until golden brown for irresistible garlic-infused goodness.
Can I use store-bought dough for these rolls?
Absolutely! If you’re short on time, using store-bought dough can be a great shortcut. Simply roll it out, add your garlic filling, and follow the usual rolling and baking steps. It will save you time while still delivering delicious flavor.
Are Garlic Swirl Rolls suitable for freezing?
Yes, these delightful treats freeze wonderfully! You can freeze the rolls before or after baking. If freezing unbaked rolls, allow them to rise and shape them before popping them in the freezer. When ready to bake, just allow them to thaw and rise before you bake them for fresh rolls.
What variations can I try with Garlic Swirl Rolls?
You can experiment with a variety of fillings to customize your swirl rolls. Consider adding cheese for a cheesy garlic experience, or incorporating spinach or herbs like parsley and basil for added flavor. Changing up your fillings allows you to tailor these rolls to suit any taste preference.
How should I store leftover Garlic Swirl Rolls?
Leftover rolls can be stored in an airtight container at room temperature for up to two days. For longer storage, keep them in the refrigerator for about a week, or consider freezing them for up to three months. To reheat, simply pop them in the oven until warm and enjoy!
Conclusion:
In summary, Garlic Swirl Rolls are a delightful addition to any meal, offering both comfort and flavor with minimal effort. The recipe shines with its simplicity; even novice bakers can create delicious rolls that impress. One of the standout features is its flexibility—feel free to experiment with various herbs and spices to suit your taste. Whether you prefer a hint of parmesan or a sprinkle of chili flakes, customization options abound. Additionally, these rolls can be prepared ahead of time, making them a convenient option for busy weeknights or gatherings. With their irresistible aroma and soft texture, Garlic Swirl Rolls will quickly become a household favorite. Try this recipe today for a tasty treat that elevates any dining experience while showcasing your culinary creativity!
Print
Garlic Swirl Rolls
- Total Time: 28 minute
Description
Garlic bread rolls are irresistibly soft and fluffy, bursting with rich garlic flavor. These homemade rolls are infused with fresh garlic in the dough and finished with a generous brushing of garlic herb butter after baking!
Ingredients
For the Dough:
- 4 cups all-purpose flour, sifted
- 2 ¼ teaspoons active dry yeast (1 packet)
- 1 ½ cups warm milk (about 110°F or 43°C)
- ½ cup granulated sugar
- ½ cup unsalted butter, melted
- 2 large eggs
- 1 teaspoon salt
For the Garlic Filling:
- ⅓ cup unsalted butter, softened
- 4–6 cloves of garlic, minced (adjust based on your garlic preference)
- 2 tablespoons fresh parsley, finely chopped (or 1 tablespoon dried)
- 1 teaspoon Italian seasoning (optional for enhanced flavor)
- ½ teaspoon chili flakes (optional for a kick)
For the Topping:
- ¼ cup grated Parmesan cheese (or your favorite cheese)
- 2 tablespoons fresh parsley, finely chopped (for garnish)
- 1 tablespoon olive oil (to brush on top before baking)
Variations and Alternatives:
If you’d like to experiment with different flavors in your Garlic Swirl Rolls, consider these alternatives:
- Add a tablespoon of sun-dried tomatoes for a Mediterranean twist.
- Incorporate cooked, crumbled bacon or diced ham for a savory filling.
- Use herb-infused olive oil in place of regular olive oil to deepen the flavor.
- Replace parsley with fresh basil or cilantro for a unique herbal note.
Instructions
Step 1: Prepare the Dough
In a mixing bowl, combine 4 cups of all-purpose flour, 1 packet (2 ¼ teaspoons) of instant yeast, and ½ teaspoon of salt. Whisk these dry ingredients together until well mixed.
Step 2: Activate the Yeast
In a separate bowl, heat 1 ½ cups of milk until warm, but not boiling. Add 3 tablespoons of sugar and stir until dissolved. Pour the milk mixture into the dry ingredients.
Step 3: Mix the Ingredients
Use a wooden spoon to stir the dough until it starts to form a ball. It’s okay if it’s slightly sticky; add a little more flour if necessary.
Step 4: Knead the Dough
Turn the dough onto a floured surface and knead it for about 5-7 minutes. Look for a smooth texture and elasticity in the dough.
Step 5: First Rise
Place the kneaded dough into a greased bowl. Cover it with a damp cloth and let it rise in a warm spot for 1-2 hours or until it has doubled in size.
Step 6: Prepare the Garlic Filling
While the dough is rising, make the garlic filling. In a small bowl, mix ½ cup of softened butter, 4 cloves of minced garlic, 2 tablespoons of chopped parsley, and a pinch of salt.
Step 7: Roll Out the Dough
Once the dough has risen, punch it down and roll it out onto a floured surface. Aim for a rectangle about 12×18 inches.
Step 8: Spread the Filling
Evenly spread the garlic mixture over the rolled dough, leaving about ½ inch of space at the edges.
Step 9: Roll the Dough
Begin at one end and tightly roll the dough into a log shape. Make sure it is compact to ensure even slices.
Step 10: Cut and Second Rise
Slice the rolled dough into 12 equal pieces. Place them in a greased baking dish. Cover and let them rise for another 30 minutes.
Step 11: Bake the Rolls
Preheat your oven to 375°F (190°C). Once heated, bake the rolls for 20-25 minutes, or until golden brown on top.
Step 12: Cool and Serve
Allow the rolls to cool slightly before serving. Enjoy the delicious aroma and flavor of your homemade garlic swirl rolls!
Notes
Reheating Tips
When reheating garlic swirl rolls, preheat your oven to 350°F (175°C). Place the rolls on a baking sheet and cover them with aluminum foil. This method helps retain moisture while heating. Bake them for 10-15 minutes or until they are warmed through. You can also use a microwave, but the oven method usually yields better results in terms of texture.
- Prep Time: 1hour hr 30minutes
- Cook Time: 20minutes
- Category: Appetizer, Side Dish
- Cuisine: American